Camera Ready: How to Photograph our Chalk Streams

Camera Ready: How to Photograph our Chalk Streams

Love that feeling of taking an awesome photo? Our chalk streams are the ideal place to get inspired! Check out our top tips for capturing these vibrant waters on camera.

With smartphone technology improving each year, more of us than ever have the ability to take fantastic photos. Our chalk stream photography competition is the perfect chance to flex your creative skills, so whether you're a camera whizz or a spontaneous snapper, here are our top tips!

Plan ahead

Before you head out on your photo-taking trip, make sure you're ready for adventure. Getting that brilliant shot can take time, so pack clothing and supplies suitable for the weather. Make sure your phone or camera is fully charged, and take a waterproof case or bag in case of sudden downpours.

You don't need fancy equipment to get a great shot, but if you're using a smartphone you may want to invest in a few affordable pieces of kit. One is a clip-on macro lens for capturing insects and fine detail. The other is a mini tripod to keep your phone still - handy in low light or on windy days.

Perhaps the most valuable thing you can bring along is knowledge. If you're looking for wildlife, get to know the relevant animal tracks, bird calls, and plant habitats. For landscapes and heritage features, local guides can be a goldmine of vantage points and hidden gems.

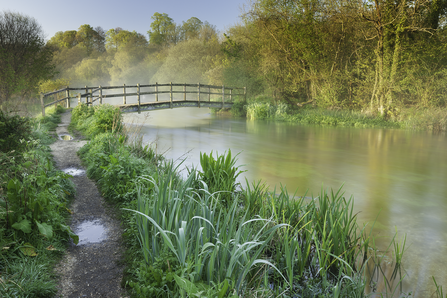
River Itchen in the early morning © Guy Edwardes/2020VISION

River Itchen in the early morning © Guy Edwardes/2020VISION

Watch the clock

When planning your trip, think about how the time of day will affect your photos. The periods just after sunrise and before sunset are called 'the golden hours' for their warm hue. Noon on a sunny day will create bright light and dark shadows. Avoid having the sun behind your subject, or you risk it only appearing in silhouette, and watch out for your own shadow sneaking into the frame!

Another changing factor is the weather: we usually pack up when rain appears, but it can add another layer of interest. Examine how water droplets cling to plants, or how stormy skies add a moody feel. For an even more dramatic change, visit the same place in different seasons. The stark beauty of the colder months is far removed from the bright blooms of spring or the simmering heat of summer.

Azure damselfly © Chris Button

Azure damselfly © Chris Button

Play with patterns

When we think of nature photography, we often think of exotic subjects like prowling tigers and towering mountains. But to capture the more familiar wonders of our chalk streams, often called "England's rainforests", you may need to view them with fresh eyes.

Try honing in on textures such as stone, metal, or tree bark. This can also be a great way to showcase underrated subjects like aquatic insects, historic structures, and non-flowering plants. If a stream is in your shot, experiment with reflections and the water's rippling surface.

You can also move around your subject in search of patterns; perhaps a few tree branches form a zig-zag shape or a group of people have eye-catching symmetry. So-called 'leading lines' - like that of a path, bridge, or stream - can also guide the eye towards interesting features.

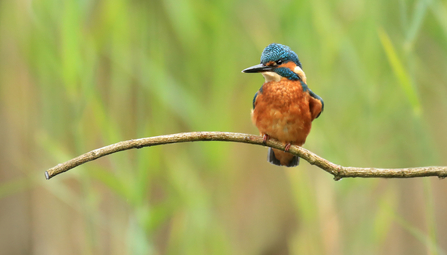
Kingfisher © Jon Hawkins, SurreyHillsPhotography

Kingfisher © Jon Hawkins, SurreyHillsPhotography

Change your perspective

Another way to put a new spin on a familiar subject is to frame it in a different way. Try looking down at it from above or going low to see it from an animal's perspective. You can also add interest with the 'rule of thirds': just position your subject 1/3 of the way from one edge of your photo.

While it's tempting to fill the frame with your subject, see how it looks with a bit of breathing room. This has the added benefit of showing it in its wider surroundings, which can add important context - for example, a heritage feature next to a modern one or wildlife with people in the background.

If you do want a closer shot of your subject then it's usually better to approach rather than zooming in. This is because digital zoom, which is used by smartphones and smaller cameras, can reduce the quality of your photos. However, only move closer if doing so is safe and won't disturb any wildlife.

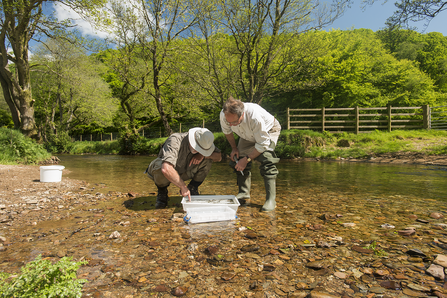
River kick sample © Ross Hoddinott/2020VISION

Taking a river kick sample © Ross Hoddinott/2020VISION

Check your settings

Not quite getting the results you wanted? Take a few moments to adjust your settings. There are common culprits for problems like blurry or dark photos, and luckily they can be changed on most cameras. If you're using a smartphone and find your options are limited, preset modes like 'portrait' or 'low light' can have similar effects.

The first setting is ISO, which controls how sensitive your camera's sensor is to light. Higher settings are useful in dim surroundings, but add 'noise' that gives your photos a grainy look. The second is shutter speed, which controls how long your camera takes to capture a photo - longer shutter speeds allow more light to enter, but can result in motion blur.

The third is aperture, which controls the size of the hole through which light reaches your camera's sensor. This affects the brightness of your photos, but also their depth of field. Larger apertures have a smaller number (prefaced by 'f/') and let in more light, but only keep one area in sharp focus. Smaller apertures let in less light, but will show more background detail.

Finally, you may want to avoid settings that use flash. The harsh light can make your photos look flat and washed out, so it's best saved for night time or when your subject is moving very fast.

Flex your skills

Now that you're a camera master, why not share your talent through our photography competition? Open to all Hampshire residents, its focus is the beautiful chalk streams that feed the Rivers Test and Itchen. You could win up to £75 of gift vouchers, and there are special prizes for under-18s.

Full competition details